SHAKEQ Connection EXAMPLES
Audio/Video Receiver via SHAKER-Out
Some modern AVRs allow assigning one of the subwoofer outputs as a dedicated bass shaker channel — without any room correction or EQ applied.
If available, this is the recommended method, as it ensures clean signal routing and better control over system integration.

What you need:
-
(1)(2) 4x RCA cable (male-to-male)
-
(3) Speaker cable(s)
Step 1: Connect the AVR to ShakEQ
Use the RCA cables (1) to connect:
-
AVR shaker output → ShakEQ input A
-
AVR subwoofer output → ShakEQ input B
Step 2: Connect ShakEQ to your amplifiers
Use the RCA cables (2) to connect:
-
ShakEQ output 1 → shaker amplifier
-
ShakEQ output 2 → subwoofer amplifier

Step 3: Set the correct output mode in ShakEQ
ShakEQ’s outputs can be configured for shaker-only or shaker + subwoofer operation.
For this setup the correct mode is "Split A | B".
To activate this mode:
-
Press and hold CANCEL until “MENU” appears on the display.

2. Use WET/DRY to navigate to the “SUB” (Subwoofer Output) option, then press SAVE to select it.

3. Use WET/DRY to change the value to "A | B", then press SAVE again.

In this Split A | B mode, each input/output pair is treated independently:
-
Input A → Output 1 (shaker path)
-
Input B → Output 2 (subwoofer path)
This configuration lets your AVR apply processing to the subwoofer while keeping the shaker signal untouched. ShakEQ’s Subwoofer Output acts as a clean pass-through, with optional delay, room correction, and BEQ (Bass EQ) support.
Step 4: Subwoofer calibration
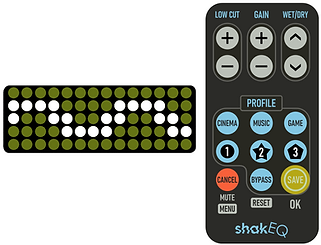
After selecting A | B mode, ShakEQ will display "CAL?" (Calibrate?). ShakEQ includes DSPeaker’s automatic subwoofer calibration, which equalizes the subwoofer’s room response at the listening position. Press SAVE to begin calibration, or CANCEL to skip it.

Calibration Process:
1. Prepare the microphone
-
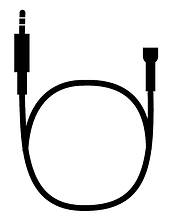
Take out the calibration microphone. If you don’t have DSPeaker’s original microphone, you can use any standard AVR microphone with a 3.5 mm plug.
-
After pressing SAVE at "CAL?", the display will prompt you to connect the microphone.


2. Run the level check
-
Once the microphone is attached, a test signal will play from the subwoofer.
-
The display shows the signal level detected by the microphone.
-
Hold the microphone at ear level in your listening spot.
-
Adjust the test signal level with WET/DRY until the “+” sign stops blinking.


3. Start calibration
-
Press SAVE to begin.
-
Keep the microphone at the listening position and stay still during the measurement.
-
The calibration sweep takes about 60 seconds.

4. Completion
-
When the process finishes, ShakEQ will reboot and apply the correction automatically.
-
You can view the measured frequency response using a USB memory stick (covered later in chapter: 6.1 Exporting frequency responses).
Toggling Calibration On/Off:
If you want to disable the correction afterwards:
-
Navigate back to "SUB" – "A | B" – "CAL?"
-
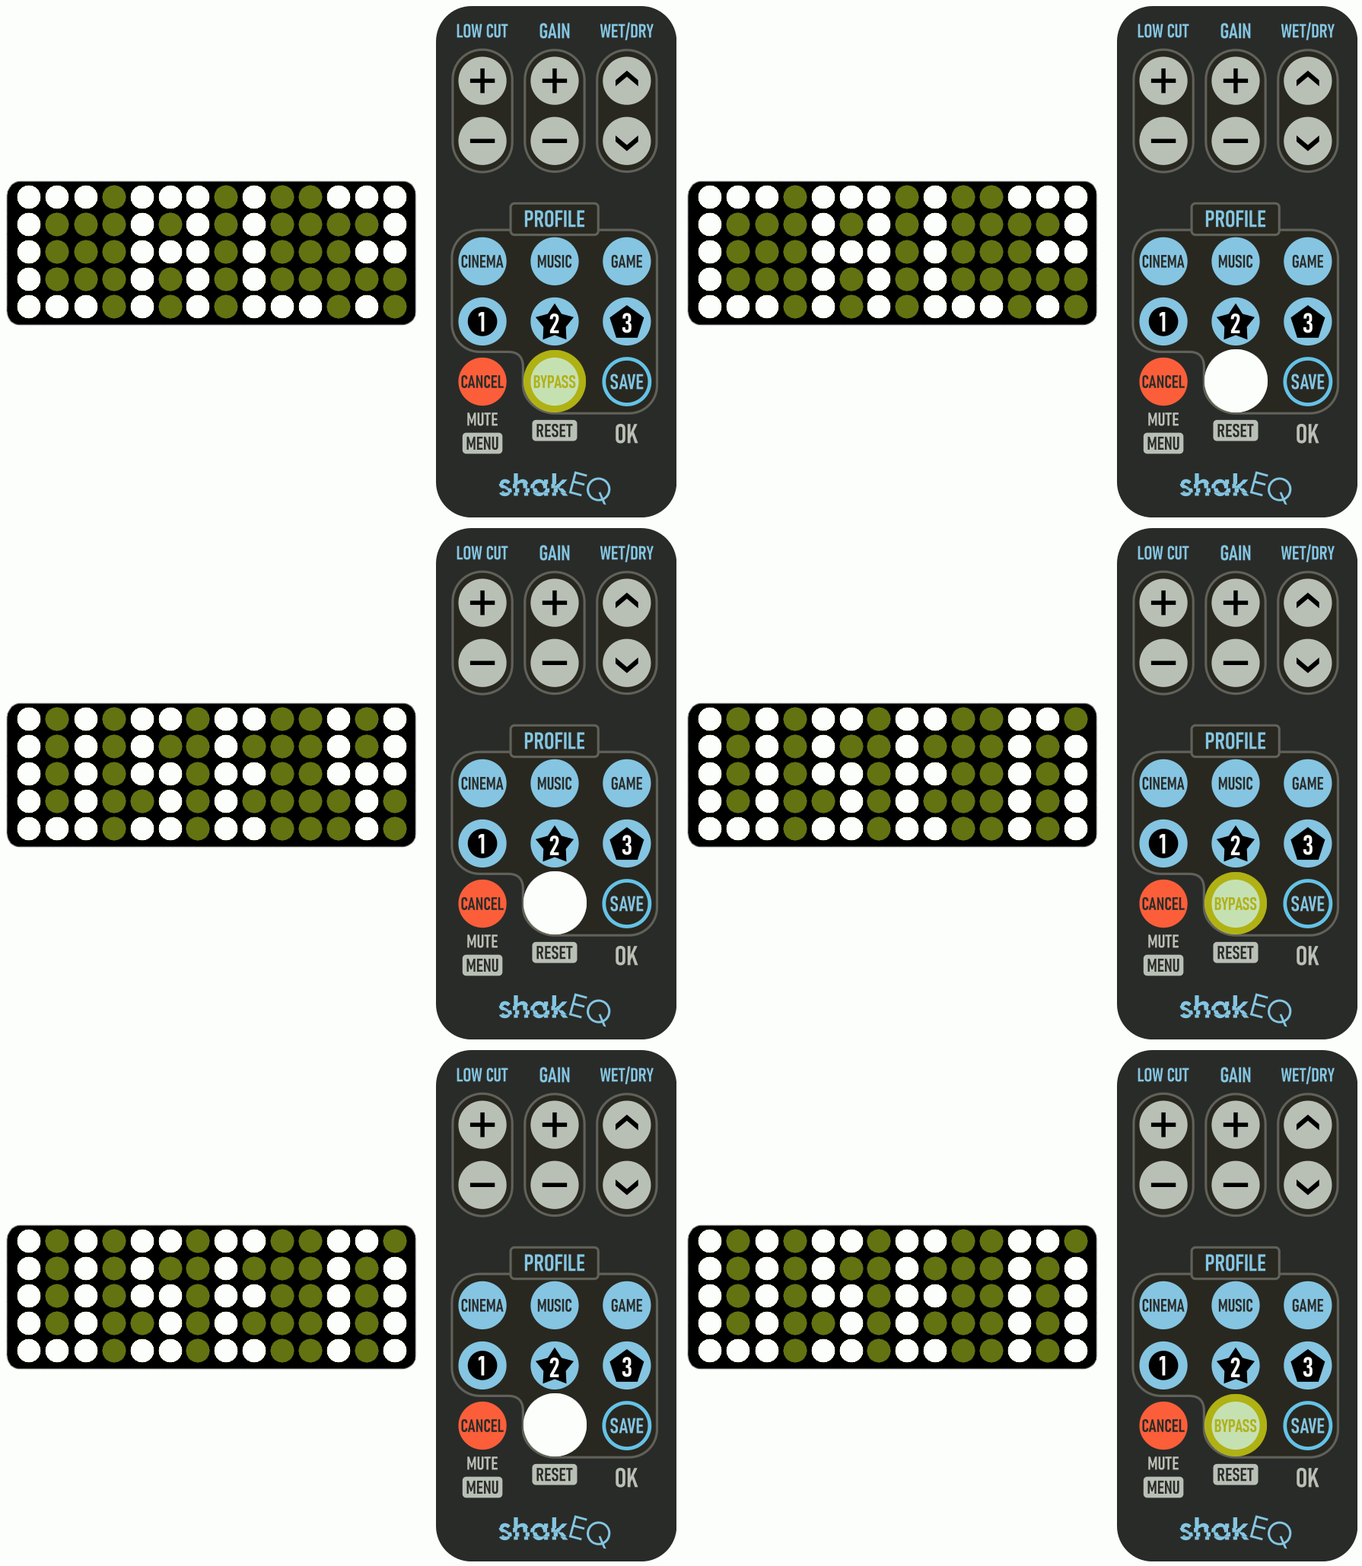
When "CAL?" is blinking, press BYPASS.
-
Use BYPASS to toggle between "USE Y" (Yes) and "USE N" (No).
-
Select "USE N" to disable correction, then confirm with SAVE.

Audio/Video Receiver via Sub-Out
If your AVR does not offer a dedicated output for the shaker, you can connect ShakEQ directly to the AVR’s subwoofer output.
Important Notes:
-
Any EQ or room correction applied by the AVR will now affect both the subwoofer and the shaker. To minimize this, ShakEQ runs its own calibration on the subwoofer. This gives the AVR a flat response to work with, so it applies minimal correction — resulting in a cleaner signal for the shaker.
-
Set all speakers to SMALL in your AVR. This ensures that bass from all channels is routed to the subwoofer output.
-
If speakers are set to LARGE, only the LFE channel will be sent to the subwoofer output, limiting heavily the audio information ShakEQ receives.
-
Tip: If you want to prevent dialogue from triggering your shaker, you can set the center speaker to LARGE.

What you need:
-
(1)(2) 3x RCA cable (male-to-male)
-
(3) Speaker cable(s)
Step 1: Connect the AVR to ShakEQ
Use an RCA cable to connect:
-
AVR subwoofer output → ShakEQ input A
Step 2: Connect ShakEQ to your amplifiers
-
ShakEQ output 1 → shaker amplifier
-
ShakEQ output 2 → subwoofer amplifier

Note: If you're using an external room correction DSP with your subwoofer, connect it after ShakEQ in the signal chain. This ensures that any latency introduced by the DSP can be properly compensated when time-aligning your subwoofer with the shaker.
Step 3: Set the correct output mode in ShakEQ
ShakEQ must be set to Summed A + B mode:
-
Press and hold CANCEL until “MENU” appears.

2. Use WET/DRY to scroll to "SUB" (Subwoofer Output), then press SAVE.

3. Use WET/DRY to select "A + B", then press SAVE to confirm.

In this mode, Inputs A and B are summed to mono, and Output 1 sends a processed shaker signal, while Output 2 passes through a clean subwoofer signal, with optional delay, room correction, and BEQ (Bass EQ) support.
Step 4: Subwoofer calibration
After selecting A + B mode, ShakEQ will display "CAL?" (Calibrate?). ShakEQ includes DSPeaker’s automatic subwoofer calibration, which equalizes the subwoofer’s room response at the listening position. Press SAVE to begin calibration, or CANCEL to skip it.

Calibration Process:
1. Prepare the microphone
-
Take out the calibration microphone. If you don’t have DSPeaker’s original microphone, you can use any standard AVR microphone with a 3.5 mm plug.
-
After pressing SAVE at "CAL?", the display will prompt you to connect the microphone.


2. Run the level check
-
Once the microphone is attached, a test signal will play from the subwoofer.
-
The display shows the signal level detected by the microphone.
-
Hold the microphone at ear level in your listening spot.
-
Adjust the test signal level with WET/DRY until the “+” sign stops blinking.


3. Start calibration
-
Press SAVE to begin.
-
Keep the microphone at the listening position and stay still during the measurement.
-
The calibration sweep takes about 60 seconds.

4. Completion
-
When the process finishes, ShakEQ will reboot and apply the correction automatically.
-
You can view the measured frequency response using a USB memory stick (covered later in chapter: 6.1 Exporting frequency responses).
Toggling Calibration On/Off:
If you want to disable the correction afterwards:
-
Navigate back to "SUB" – "A | B" – "CAL?"
-
When "CAL?" is blinking, press BYPASS.
-
Use BYPASS to toggle between "USE Y" (Yes) and "USE N" (No).
-
Select "USE N" to disable correction, then confirm with SAVE.

Audio/Video Receiver via Zone 2

If you're using a stereo system, the easiest way to connect ShakEQ to your AVR is through the Zone 2 RCA outputs.
For this connection you need:
(1) RCA stereo cable (2x RCA Male to 2x RCA Male)
(2) RCA cable (RCA Male to RCA Male)
(3) Speaker cable
Simply connect the Zone 2’s stereo output to ShakEQ’s inputs A and B with a RCA stereo cable (1).
After that connect ShakEQ’s output 1 or 2 to your shaker amp (2).
-
It’s recommended to consult your AVR’s manual to ensure all settings are correctly configured for Zone 2 to function as expected.
-
Keep in mind that Zone 2 is stereo-only on most AVRs and often does not support HDMI sources, which means it may not be suitable for bass shaker setups when using multichannel audio.
-
Also note: when using Zone 2 for ShakEQ, the shaker’s volume will not follow your main listening volume, as they are controlled separately. To ensure a strong signal, set the Zone 2 output level to around 80–90% of its maximum.
TV via optical output (Toslink)

For this connection you need:
(1) Toslink cable (Toslink Male to Toslink Male)
(2) 2x RCA splitter (RCA Male to 2x RCA Female)
(3) 2x RCA stereo cable (2x RCA Male to 2x RCA Male)
(4) RCA cable (RCA Male to RCA Male)
(5) Speaker cable
To connect ShakEQ to your TV you need a digital-to-analog converter with an optical input (1).
Use two RCA splitters (2) on the LEFT and RIGHT outputs to share the same audio with ShakEQ and the speakers/headphone amp.
Connect the split LEFT and RIGHT (3) channels to ShakEQ’s inputs A and B. Inputs A and B are processed to mono internally.
-
ShakEQ’s outputs 1 and 2 send the same mono signal, so you can use either or both for your shaker amplifier(s) (4).
TV with a soundbar

For this connection you need:
(1) HDMI ARC cable (HDMI Male to HDMI Male)
(2)(3) 3x RCA cable (RCA Male to RCA Male)
(4) Speaker cable
To connect ShakEQ to your soundbar use the soundbar’s subwoofer output. If your soundbar does not have a subwoofer output, read the bottom section for alternative connections.
Use an HDMI ARC cable (1) to send the audio from the TV to the Soundbar.
Connect the Soundbar's sub output (2) to ShakEQ’s input A or B.
Connect then (3) ShakEQ's
-
Output 1 to your shaker amp
-
Output 2 to your subwoofer amp

Step 1: Set the correct output mode in ShakEQ
ShakEQ's outputs are assignable to either shaker-only output or shaker/subwoofer output. For this connection we need to activate the Summed A + B mode.
1. Press and hold CANCEL until “MENU” appears on the display.

2. Use WET/DRY to navigate to the “SUB” (Subwoofer Output) option, then press SAVE to select it.

3. Use WET/DRY to change the value to “A + B”, and press SAVE to confirm.
Output 2 will now function as an unprocessed pass-through with an optional delay function.

Step 2: Subwoofer calibration
After selecting A + B mode, ShakEQ will display "CAL?" (Calibrate?). ShakEQ includes DSPeaker’s automatic subwoofer calibration, which equalizes the subwoofer’s room response at the listening position. Press SAVE to begin calibration, or CANCEL to skip it.

Calibration Process:
1. Prepare the microphone
-
Take out the calibration microphone. If you don’t have DSPeaker’s original microphone, you can use any standard AVR microphone with a 3.5 mm plug.
-
After pressing SAVE at "CAL?", the display will prompt you to connect the microphone.


2. Run the level check
-
Once the microphone is attached, a test signal will play from the subwoofer.
-
The display shows the signal level detected by the microphone.
-
Hold the microphone at ear level in your listening spot.
-
Adjust the test signal level with WET/DRY until the “+” sign stops blinking.


3. Start calibration
-
Press SAVE to begin.
-
Keep the microphone at the listening position and stay still during the measurement.
-
The calibration sweep takes about 60 seconds.

4. Completion
-
When the process finishes, ShakEQ will reboot and apply the correction automatically.
-
You can view the measured frequency response using a USB memory stick (covered later in chapter: 6.1 Exporting frequency responses).
Toggling Calibration On/Off:
If you want to disable the correction afterwards:
-
Navigate back to "SUB" – "A | B" – "CAL?"
-
When "CAL?" is blinking, press BYPASS.
-
Use BYPASS to toggle between "USE Y" (Yes) and "USE N" (No).
-
Select "USE N" to disable correction, then confirm with SAVE.

PC via line output (3pin TRS)

For this connection you need:
(1) 3.5mm 3pin stereo audio adapter (3.5mm TRS Male to 2x RCA Female)
(2) 2x RCA splitter (RCA Male to 2x RCA Female)
(3) 2x RCA stereo cable (2x RCA Male to 2x RCA Male)
(4) RCA cable (RCA Male to RCA Male)
(5) Speaker cable
To connect ShakEQ to your PC use the PC’s stereo line output (usually color coded green).
Use a stereo audio adapter (1) to split the output to LEFT and RIGHT channels.
Connect the LEFT and RIGHT channels to RCA splitters (2). The splitters allow you to send the same output to ShakEQ and the speakers/headphone amp.
Connect the split LEFT and RIGHT channels (3) to ShakEQ’s inputs A and B. Inputs A and B are processed to mono internally.
ShakEQ’s outputs 1 and 2 send the same mono signal, so you can use either or both for your shaker amplifier(s) (4).
If your PC does not have a separate line output there are other options as well:
-
Use the PC’s headphone output (refer to the connection guide’s “PC via headphone output”-section for more information).
-
If you are using a wireless Bluetooth headset it is possible to send Bluetooth audio to the headset and use the line output simultaneously with the help of an audio mixer software. The downside of this method is that it may disable the headset’s microphone.
-
Use a separate USB DAC with RCA outputs (refer to the connection guide’s “Game console”-section for more information).
PC via headphone output (4pin TRRS)

For this connection you need:
(1) 3.5mm 4pin to 3pin audio+mic splitter (3.5mm TRRS Male to 2x 3.5mm TRS Female)
(2) 3.5mm 3pin stereo audio splitter (3.5mm TRS Male to 2x 3.5mm TRS Female)
(3) 3.5mm 3pin to 2x RCA audio adapter (3.5mm TRS Male to 2x RCA Male)
(4) 3.5mm 3pin to 4pin audio+mic splitter (2x 3.5mm TRS Male to 3.5mm TRRS Female)
(5) 3.5mm 4pin audio cable (3.5mm TRRS Male to 3.5mm TRRS Male)
(6) RCA cable (RCA Male to RCA Male)
(7) Speaker cable
Most gaming laptops only have a TRRS headphone output for audio. TRRS contains the microphone’s signal in addition to stereo audio, so to connect ShakEQ to your headphone output we must first separate the microphone audio and the stereo audio with a mic+audio splitter. (1)
Use a stereo audio splitter (2) to split the audio from the mic+audio splitter.
Connect ShakEQ’s inputs A and B to the splitter with a stereo 3.5mm to RCA adapter (3).
Connect the microphone and audio to the headset using another mic+audio splitter (4) and the headphone’s TRRS cable (5). These two cables are sometimes provided with the headset.
ShakEQ’s outputs 1 and 2 send the same mono signal, so you can use either or both for your shaker amplifier(s) (6).
Other connection methods:
-
If you are using a wireless Bluetooth headset it is possible to send Bluetooth audio to the headset and use the headphone output simultaneously with the help of an audio mixer software. The downside of this method is that it may disable the headset’s microphone. The benefit is that you would only need a 3.5mm to RCA audio adapter (3) to connect ShakEQ to your PC.
-
Use a separate USB DAC with a headphone output and RCA outputs.
Game console

For this connection you need:
(1) USB cable (USB male to USB male)
(2) 2x RCA splitter (RCA Male to 2x RCA Female)
(3) 2x RCA stereo cable (2x RCA Male to 2x RCA Male)
(4) RCA cable (RCA Male to RCA Male)
(5) Speaker cable
Modern game consoles do not provide audio outputs straight from the console, so a separate USB DAC is recommended (1). Note that not all USB DACs are compatible with game consoles, so check compatibility before buying.
Use two RCA splitters (2) on the DAC’s LEFT and RIGHT RCA outputs to split the audio to ShakEQ and the speakers/headphone amp. Note that if your DAC has multiple stereo outputs you might not need splitters at all.
Connect the split LEFT and RIGHT channels (3) to ShakEQ’s inputs A and B. Both input channels are processed to mono internally. Connect the remaining split LEFT and RIGHT channels to your speakers/headphone amp.
Connect ShakEQ’s output 1 or 2 to your shaker amp (4). Both outputs send the same signal, so you can use either or both for your shaker amplifier(s) (5).
Other connection methods:
-
The TRRS headphone output from the game controller can be split for headphones and ShakEQ. Refer to the connection guide’s “PC via headphone output”-section for more information.
-
An HDMI audio extractor could be used in a similar way than a USB DAC, although it is not recommended, since it is not a very reliable setup.
-
For wireless headphones there are unfortunately no solutions at the moment.


