SHAKEQ INITIAL SETUP GUIDE
This guide will help you optimize ShakEQ for your system.
Chapters 1–5 cover the essential steps for initial setup.
Chapters 6–12 explore ShakEQ’s features and practical usage in more detail.
1 Connections

ShakEQ connects between your audio source and your shaker amplifier(s), allowing you to shape and optimize your shaker system's performance.
It features two analog RCA inputs (A and B) and two analog RCA outputs (1 and 2).
The input/output routing can be configured in three ways to suit different setups:
1. Shaker Only (Default Mode)
-
Inputs A and B are summed to mono
-
Outputs 1 and 2 both carry the same processed shaker signal
2. Shaker + Subwoofer (Summed A + B)
-
Inputs A and B are summed to mono
-
Output 1 = processed shaker signal
-
Output 2 = subwoofer signal
3. Shaker + Subwoofer (Split A | B)
-
Input A = shaker input
-
Input B = subwoofer input
-
Output 1 = processed shaker signal
-
Output 2 = subwoofer signal
The optimal configuration is to connect ShakEQ to an AVR that provides separate outputs for subwoofer and bass shaker signals. This enables the use of Split A | B mode (Option 3), allowing fully independent signal paths, automatic room correction for the subwoofer and the ability to time-align your shaker with the rest of your sound system.
Other connection types are also supported. For wiring diagrams, setup examples, and instructions on activating subwoofer output mode, refer to the Connection Examples page.
2 Input gain optimization

Note: The videos embedded in this guide have been additionally compressed due to our web host’s policy and are intended for preview purposes only. For accurate results, we recommend downloading a suitable video for your system from the links below:
If the downloadable videos are difficult to play on your system, the streamable versions can still provide reasonably good results.
Tip 1: On YouTube, enable Repeat - Currently playing.
Tip 2: To find the videos directly on YouTube, search for dspeaker info, open the DSPeaker Info channel, and navigate to the Playlists tab. The setup guide playlist is available there.
3 SETTING VOLUME LEVELS
Next we will adjust the volume level of your shaker amplifier.
To prevent any damage to your bass shaker, please check that your shaker amplifier’s power rating does not exceed your shaker’s max rating.
1. Set your shaker amplifier’s volume to zero and switch the power on.
2. ShakEQ should have the right settings preset in it’s initial mode, but it is good to double check the settings. Use ShakEQ’s remote control to set:
• Master profile to CINEMA 0 (C0)
• LOW CUT to 4Hz (LC 4)
• GAIN to 0

3. Take out a movie or a game you are familiar with and play a scene with lots of explosions and loud sounds. The listening volume should be at your typical listening level.
4. Gradually turn up the volume of your shaker amplifier until the level feels satisfying. The goal is to set the maximum tactile level you want to experience during intense scenes.
4 Calibration
ShakEQ can measure and equalize the total frequency response of your shaker system at the listening position. This process eliminates resonance peaks caused by the mounting structure and boosts areas that may be lacking. This results in a wider and more balanced tactile response.
1. Take out the included red sensor discs. Connect the 3.5mm sensor jack into ShakEQ’s sensor connector.

2. Place both discs on your seating position of the furniture to be equalized. The flat side of the disc should be against the furniture. Sit on top of both discs (one for each buttock) and center your ischial bones on the indentations of the discs.

3. Increase the volume using the Wet/Dry +/- buttons until you feel a noticeable amount of vibration.
The display shows how strong the signal picked up by the sensor disc is. A blinking plus sign (+) indicates that the volume should be raised further.
Once the plus sign stops blinking, you’ve reached the minimum level required for a valid calibration.
If possible, it's recommended to perform the calibration at a level higher than the minimum.
If you're unable to reach the minimum threshold, simply find the strongest reasonable volume level you can and proceed with the calibration at that setting.

4. Press SAVE to start the calibration. For the best result sit with maximum weight on your ischial bones. Avoid leaning on the backrest. Stay as still as reasonably possible. The calibration sweep takes about 70 seconds. You can cancel the calibration at any time by pressing the CANCEL button or by unplugging the sensor jack.

5. After the first measurement, the display will show "NEXT".
Calibration requires three sweeps taken from different positions.
Once the first position is measured, move both yourself and the measurement discs approximately 10 cm (4 inches)—preferably forward or backward. Press SAVE to start the next measurement.
Repeat this process until you have completed three unique measurements.

When the last sweep is done ShakEQ returns to display the current profile. The correcting EQ is now activated and the sensor jack can be unplugged.
5 DELAY ADJUSTMENT
To achieve proper integration, your bass shaker should be time-aligned with the sound you hear.
ShakEQ lets you adjust delay either for the shaker (positive delay) or the subwoofer (negative delay).
Note: Subwoofer delay is only available when your subwoofer is connected to ShakEQ’s Output 2. To enable this, activate the subwoofer output by setting “SUB” to "A + B" or "A | B" in ShakEQ’s menu. For further instructions, see the Connection Examples page.
1. Open the Delay Menu
-
Press and hold CANCEL until “MENU” appears.
-
Use WET/DRY to navigate to “DLAY”, then press SAVE to select it.


You can now adjust delay in milliseconds using:
-
LOW CUT: ±10 ms per step
-
GAIN: ±5 ms per step
-
WET/DRY: ±1 ms per step
2. Download or Stream the Test Video
Use the video below to help set your delay.
For multichannel systems, download the surround version—it sends signal only to the LFE channel.
If using YouTube, remember to enable loop playback.
Downloadable versions:

3. Get a Feel for Timing Differences
-
While the video is playing, set the delay to +90 ms. The shaker will now respond after the sound.
Can you feel the separation? -
Press CANCEL to reset to 0 ms, then scroll to -90 ms. Now, the sound is delayed.
You’ll notice that delayed sound feels more natural than delayed vibration—this mirrors real-world physics, where tactile signals arrive before sound.
4. Set the Optimal Delay for Your System
-
Return to 0 ms and try different values in 10 ms steps. The goal is to find the delay setting where the bass feels most powerful.
Most people can’t reliably detect differences smaller than 10 ms, so don't worry about finding an exact number—all that matters is that the sync feels right.
-
Press SAVE when ready to store the setting and exit the menu.
5. Recalibrate Speakers in the AVR
Now that your subwoofer and bass shaker are time-aligned, your sub’s timing may have changed relative to your other speakers.
-
Run the AVR’s speaker calibration process again—this will re-sync your entire system to match the new timing and frequency response of the subwoofer.
Congratulations — you’ve completed the initial setup!
The following chapters will introduce ShakEQ’s core features and show you how to use them in practice.
6 VERIFYING the frequency responsEs

6.1 Exporting frequency responses
ShakEQ provides tools to inspect and verify your shaker system’s and your subwoofer’s frequency responses. To view the responses visually, you can export the measured graph from a calibrated ShakEQ unit to a USB memory stick.
1. Format a USB memory stick using the FAT32 file system*.
2. Turn off ShakEQ.
-
Press CANCEL - The display will show "MUTE".
-
Then press BYPASS - the display will turn off, and ShakEQ will enter standby mode.
3. Insert the USB memory stick into ShakEQ's USB port.
-
Press CANCEL to power the unit back on. A progress bar will appear on the display.

4. Once the process completes, the USB stick will contain four files:
-
BEFORE.txt – Your shaker system’s frequency response before calibration.
-
AFTER.txt – The simulated shaker response after the automatic equalizer has been applied.
-
RESP.svg – A graphic showing both "BEFORE" and "AFTER" responses, viewable in any web browser.
-
RESP_SUB.svg – A graphic showing responses for your subwoofer calibration.

The text files can be imported into analysis tools such as Room EQ Wizard (REW) for further inspection.
*) Note: Memory sticks with a capacity of 64 GB or more are typically formatted using the exFAT file system, which is not compatible with ShakEQ. However, ShakEQ includes a built-in tool for reformatting such drives to the supported FAT32 format.
To format a memory stick using ShakEQ:
-
Insert the USB stick into ShakEQ’s USB port.
-
Press and hold CANCEL until “MENU” appears on the display.
-
Use WET/DRY to navigate to the “FMT” (Format) option.
-
Press SAVE to select it and follow the on-screen instructions.

The response files will be automatically saved to the memory stick once formatting is done.
Warning: Formatting will permanently erase all data on the USB stick. Make sure to back up any important files before proceeding.
6.2 Sine wave Generator

It is also possible to inspect the frequency response perceptually. ShakEQ features a sine wave generator that allows you to scan through different frequencies and compare their relative volume levels.
To use the sine generator:
1. Press and hold CANCEL until you see “MENU” on the display.
2. Use WET/DRY to scroll through the menu and select the item labeled "GEN". Press SAVE to start the generator.
The generator starts at 99 Hz, and the signal passes through the EQ settings made during calibration.
You can now:
-
Adjust volume with GAIN.
-
Change frequency using WET/DRY.
-
Press BYPASS to feel the signal without EQ
-
Quickly switch between three preset frequencies using buttons 1, 2, and 3. This is especially effective when used with BYPASS to compare levels across different frequency ranges. The default frequencies are 20Hz, 40Hz and 60Hz.

To store different frequencies:
Dial in the desired frequency, press SAVE (the screen will blink), then press 1, 2, or 3 to store the value to that button.
7 Solving common calibration issues
If you're satisfied with your calibration results, you can move on to the next section. If you think there's still room for improvement, click this link for tips on how to refine your results.
8 Master profiles

The three master profiles each use a distinct processing chain tailored for a specific type of content:
-
Cinema (C) – optimized for movies
-
Music (M) – optimized for music
-
Game (G) – optimized for gaming
The display indicates the active master profile (C, M, or G) and the current Wet/Dry value (0–5).


Each master profile includes four adjustable parameters:
-
Low Cut
-
Gain
-
Wet/Dry
-
Bass Extender (accessed by pressing and holding the Wet/Dry buttons)

Changes made to master profiles are always automatically saved.
We'll explore how to use these profiles in the next chapters.
9 Wet/Dry & Low CUT ADJUSTMENTS
About the demonstration videos:
The following demonstration videos are intended to illustrate how ShakEQ’s features work and how the controls interact. Think of the videos as a learning tool—a fast way to understand what each feature does. Once you are familiar with the controls, fine-tune ShakEQ using the movies, games, or other material you normally listen to, and adjust the settings to match your system and personal preference.

Downloadable versions:

11 Custom profiles
The three custom profiles are user-defined slots where you can save any current profile state for later recall.

For example, if you primarily use ShakEQ for gaming, you might create three custom Game profiles—each fine-tuned for a specific game.


To save your current settings to a custom profile:
-
Press Save.
-
When prompted, press 1, 2, or 3 to store the settings in the corresponding custom profile slot.
To recall a saved custom profile, simply press the corresponding number (1, 2, or 3). The display will show the number of the custom profile, the master profile (C,M or G) and the Wet/Dry value.
Note: Changes made in the custom profiles are not automatically saved.
12 Extended features
ShakEQ includes a set of extended features designed for advanced users who want more control over their system. These features are not part of the standard setup and require the use of a USB memory stick with text files prepared for ShakEQ.
With Extended Features, you can:
-
Apply BEQ (Bass EQ) filters that restore missing low-frequency content in movie soundtracks. These filters affect both the shaker and the subwoofer.
-
Create and load custom filters for the subwoofer only, such as low-pass or high-pass filters, to fine-tune your system’s response.
Note: These tools assume some familiarity with filter concepts and system tuning. Incorrect settings or custom filters may negatively affect system performance.
12.1 BEQ
BEQ (Bass EQ) is a community-driven project that restores deep bass to movie releases where the lowest frequencies have been reduced to suit small home systems. ShakEQ supports BEQ filters. Filtering is applied at ShakEQ’s input stage, so the modified signal feeds both the shaker and the subwoofer.
More about BEQ: https://beqdesigner.readthedocs.io/en/latest/
How to Use BEQ:
1. Visit https://www.dspeaker.com/beqdatabase
2. Select a movie and press Export. A file named dspeaker.beq will be downloaded.

3. Copy the file to a FAT32-formatted USB stick.

4. Insert the USB stick into ShakEQ’s USB port. Power off ShakEQ by pressing CANCEL, then BYPASS.
5. Power ShakEQ back on by pressing CANCEL. The movie title will be displayed three times to confirm that the BEQ filters are active.

Removing BEQ Filters:
To remove BEQ filters, simply restart ShakEQ without the USB stick or with no dspeaker.beq file on it. ShakEQ reloads BEQ files at every startup.
⚠️ Warning: Always remember to remove or replace BEQ filters after watching a movie. Leaving BEQ active with unrelated content may cause severe clipping and risk equipment damage.
For more information on using BEQ see the documentation available in the Downloads section.
12.2 Custom subwoofer filters
Similar to ShakEQ’s BEQ system, you can create custom subwoofer filters by importing prepared text files (dspeaker.sub) via USB memory stick. This feature is intended for advanced users who want greater control over subwoofer response.
Possible use cases include:
-
Low-pass filtering for a stereo 2.1 system
-
High-pass filtering for a bass reflex subwoofer
-
Manually creating room correction filters
-
Designing house curves to slightly elevate the lowest frequencies
How to create subwoofer filters:
1. Write the desired filters into a plain text file. Click here to download the template shown below.

File format:
-
First line:
shakeqbeq (followed by version number, currently 1) -
Subsequent lines: define filters, one per line, using the following structure:
filter: (filter type) freq: (cutoff frequency value) gain: (filter gain value in decibels) q: (filter Q value)
-
You may add comments by starting a line with #.
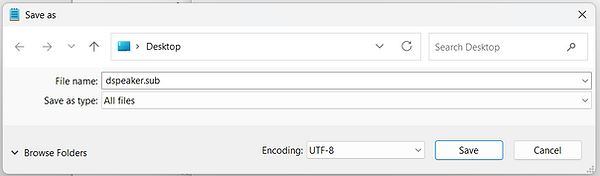
2. Name the file as dspeaker.sub and save it as type: All files.
3. Copy the file to a FAT32-formatted USB stick.

4. Insert the USB stick into ShakEQ’s USB port. Power off ShakEQ by pressing CANCEL, then BYPASS.
5. Power ShakEQ back on by pressing CANCEL. At startup, the display will show “=EQ=” to confirm that custom subwoofer filters are active.
Note: If BEQ filters are also applied at the same time, only the movie title will be displayed.

Removing Subwoofer Filters:
To remove subwoofer filters, simply restart ShakEQ without the USB stick or with no dspeaker.sub file on it. ShakEQ reloads SUB files at every startup.
For convenience, below are ready-to-use files for common use cases. Download and extract the ZIP archive, then copy the dspeaker.sub file to your USB memory stick.
More instructions for creating subwoofer filters can be found in the Downloads section.
This concludes the setup guide!
Your device is now calibrated to your system, and you’re familiar with its main functions.
Enjoy your experience with ShakEQ!
For additional details, refer to the ShakEQ User Manual.